Nostrautica: Event Organizer Guide
Nostrautica is an event app built around one idea: the point of your event is who meets whom. Attendees record short intro videos; an optional AI coordinator analyzes them and tells every attendee who they should talk to and why. This guide takes you from nothing to a running event.
What you'll do
- Create your identity (once).
- Create the event, optionally attaching an AI coordinator right there, or later.
- Share the event: open link, invite codes, or both.
- Approve attendees (or let invite codes auto-approve them).
- Post updates, customize your event page, and run the event.
Everything runs in your browser. There is no server to set up. The app stores event data, encrypted, on the open Nostr network. Your browser holds the event's keys, so use one browser you'll keep (and back up your identity when prompted).
A note on how the app is laid out. Once you're inside an event, the bottom bar is event-scoped: Overview, People, Updates, and More all act on the event you're in, with a compact header showing the event's name and your status. Matches, for attendees who have any, show up at the top of People. Two further tabs appear only once you've turned those features on (§6.5), for you and for attendees: Talks sits between Overview and People if talks are set to be watched before the event ("prerecord-first"), and right after People otherwise; Chat comes after People too, following Talks when both are on. Your global stuff (all your events, messages, settings, your identity) lives under More. As the organizer you also get Manage event in that menu, which opens the admin console described in §3.
1. Create your identity
Open the app. On the welcome screen, type your name and tap Create my identity (you can add a photo too). No email, no password: the account is created instantly. If you already use Nostr, tap Already on Nostr? Sign in and use your key, browser extension, or remote signer instead.
Tip: you don't have to do this as a separate step. If you go straight to creating an event while logged out, the app makes your organizer identity as part of the same submit.
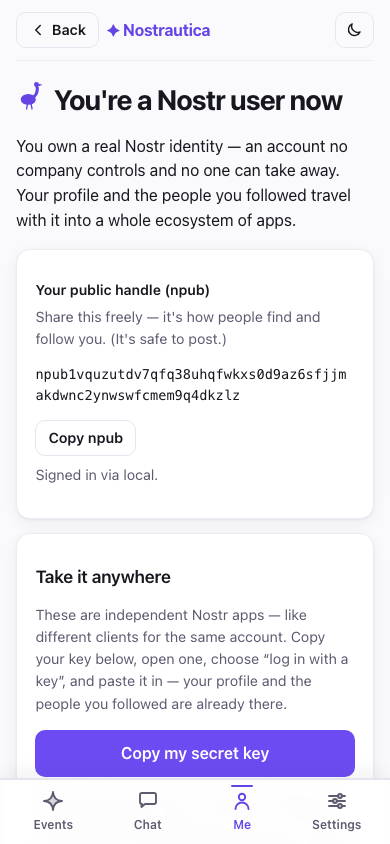
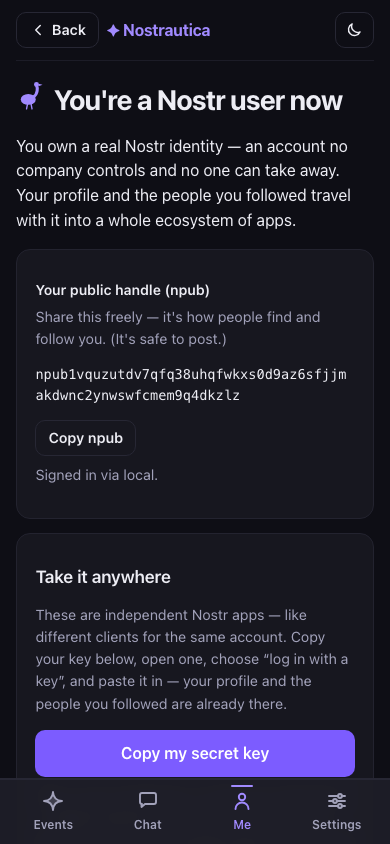
When your identity is created you'll be shown a backup card. Do it now: tap Copy my secret key and paste it somewhere safe (a password manager). Anyone with that key is you; without it, a lost browser profile means a lost event. "More ways to back up" offers an emailed recovery link or a password-protected file.
2. Create the event
Choose Create an event and fill in the form:
Title, summary, start/end, location: shown publicly to anyone with the link.
Approval decides how people get in:
- Manual review: every request waits for your approval.
- Invite codes only: an invite link gets you in; no other way.
- Invite codes + manual: invite links auto-approve (with a coordinator attached); people without a code wait for you. Recommended for most events.
Event language: see below.
AI matchmaking: set to On if you plan to attach a coordinator (§5). You can attach the coordinator later; leave the setting on now.
AI coordinator (optional): pick one right here on the create form, the same discovery list described in §5, so an invite-code event can auto-approve and start matching from the moment it goes live. Skip it and attach one later from Admin → Settings if you'd rather decide after seeing how the event fills up. Nothing else on this form depends on it.
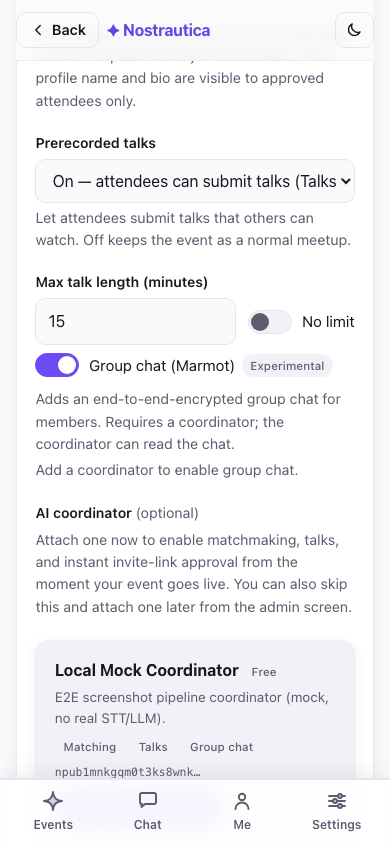
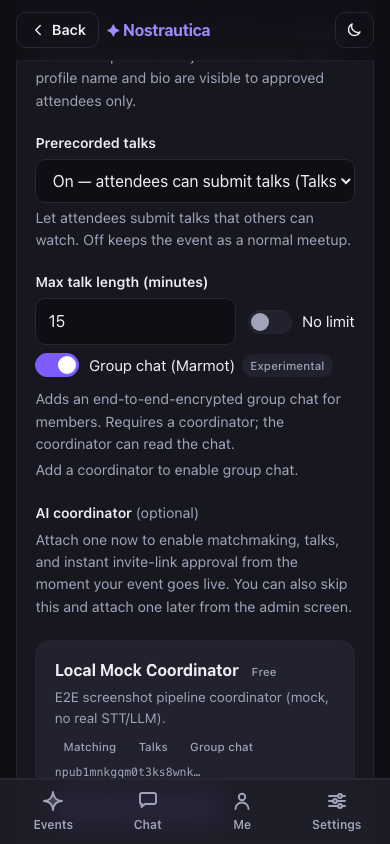
Join as a participant yourself: checked by default: you're enrolled like any attendee, so the first person who joins sees at least you in People instead of an empty list (and you can be matched too, once you record an intro). Your name and bio are visible to approved attendees only; uncheck it if you'd rather organize without appearing in the roster.
Advanced (collapsed): upload an event icon and banner (a design is generated from the title otherwise) and set the intro-video length cap. You can pick and crop the icon/banner even before you have an identity. If you're creating the event while logged out, the app holds the cropped images locally and uploads them for you right after it creates your identity on submit, so you don't have to stop and sign in first.
Event language
Pick the language your event runs in. Start typing to search by language name in your own language or by its two-letter code (type "slov" or "sk" to find Slovak). Your own language, the ones your browser prefers, and every language the app itself is translated into are pinned to the top; everything else follows alphabetically.
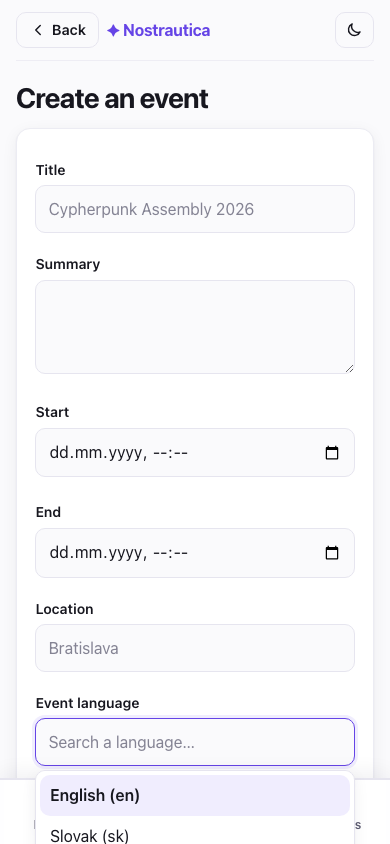
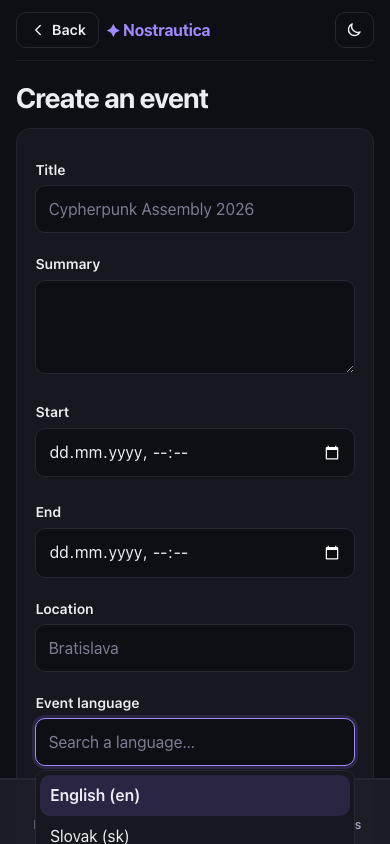
The language does three things. It sets the default interface language for attendees who open your event (they can still switch it in Settings). It sets the language the AI writes in: match reasoning and profile summaries are always in your event language, no matter what language each attendee actually speaks or records in. Someone can record their intro in English at a Slovak event and everyone still reads why-you-should-meet-them in Slovak. And when an attendee writes their bio in a different language, the coordinator publishes a translation into your event language so the rest of the room can read it. The person's original text is always kept and shown too. English is the default; leave it as-is for an English event.
(You never have to re-run anything for this: when an attendee updates their intro, the system automatically recomputes only the matches that person is part of.)
Note the copy under the form: key rotation is forward-only. Revoking someone (§4) protects future content, not what they've already seen. Configure a retention window in Admin → Settings → Delete member data after the event (a number of days, or blank to keep it indefinitely). Attendees see the declared period at join, and once it passes the coordinator cleans up its own copies too, not just the published records. It's a real cleanup, not an absolute guarantee that every last copy is gone everywhere (relay deletion is best-effort, and backups are a separate matter). See Encryption & Privacy for the exact limits.
After creating, you get a shareable link, a next-steps checklist, and a receipt: each publishing step reported independently, so a partial failure is obvious and retryable instead of silently missing:
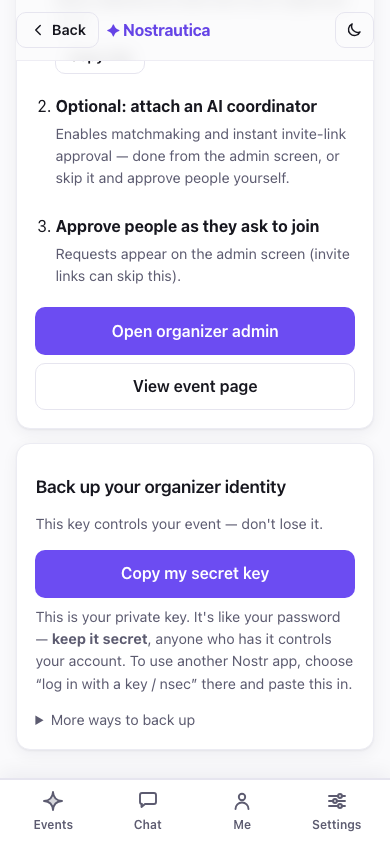
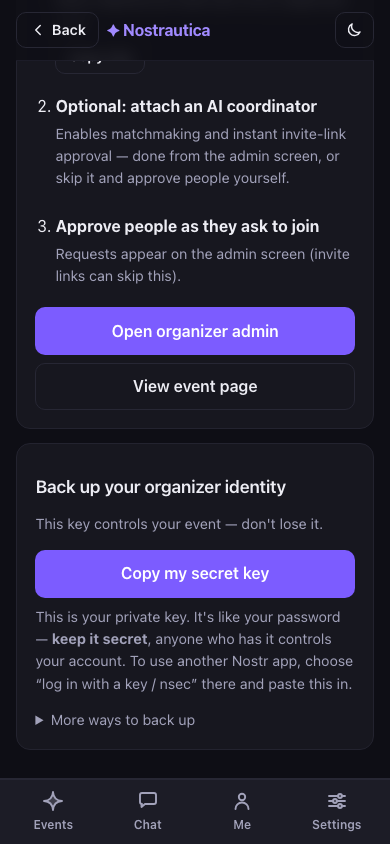
The event itself always succeeds if you got this far. Two secondary steps can fail independently on a bad connection: enrolling you as a participant, and sending the coordinator its install grant if you picked one on the form. Each gets its own Retry button right in the receipt rather than forcing you to redo the whole form. A third line, backup pending, just means you haven't saved your key yet (see step 1). It isn't an error.
Running this event again next month? Once it exists, open it and use Duplicate event from the event menu: a fresh Create form pre-filled from this one's title, description, images, language, and settings (title becomes "Copy of …"). You still review and submit it, and it becomes a brand-new event with its own keys and an empty roster, not a copy of the data.
3. Open the admin screen and share
Tap Open organizer admin (also reachable any time from More → Manage event). Your control panel is split into two tabs, so running the event day to day never means scrolling past one-time setup:
- Administration is the tab you land on, and the one you'll return to most: a status line (pending count, with a one-tap jump), join requests at the very top so admitting people is never buried, invite-code generation, the approved-attendees list (revoke/re-process), talk moderation, and Communicate (posts/updates).
- Settings: the one-time-per-event stuff: the AI coordinator (§5), event page menu & layout, appearance/theme CSS, prerecorded talks mode, group chat, and co-organizers. If you picked a coordinator on the create form (§2), it's already showing as attached here.
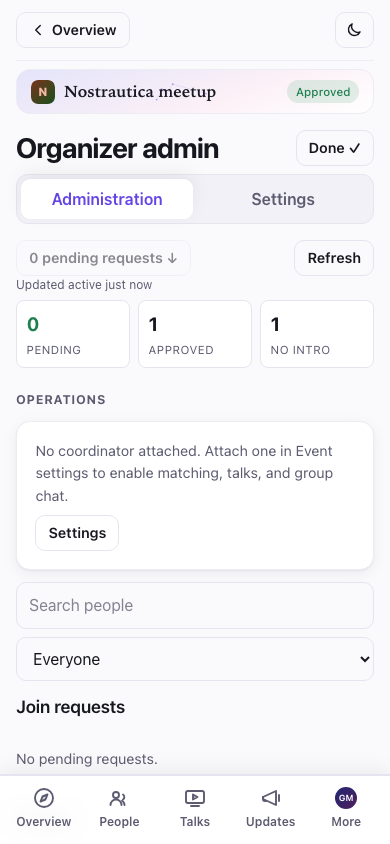
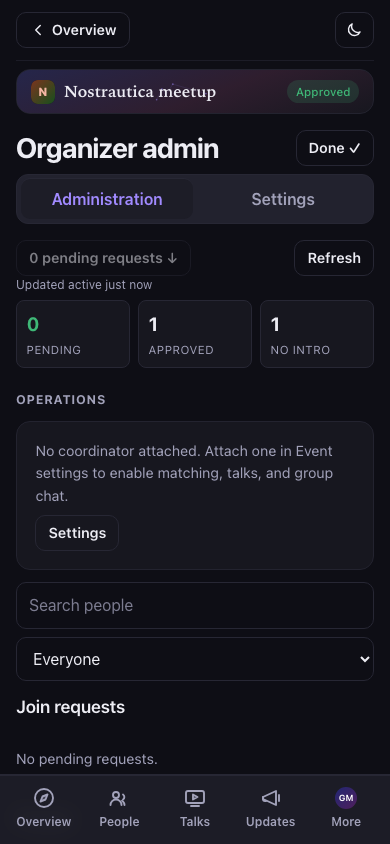
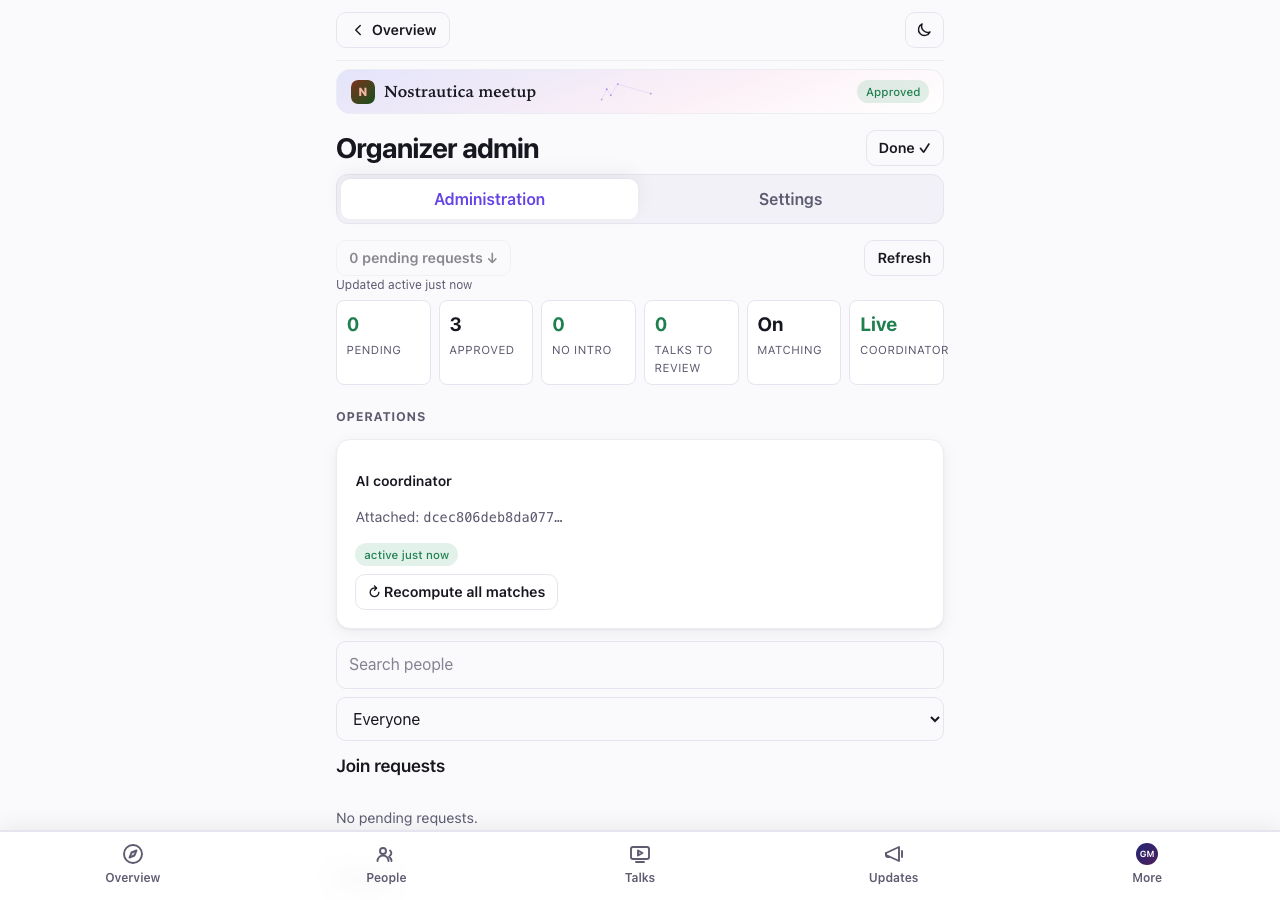
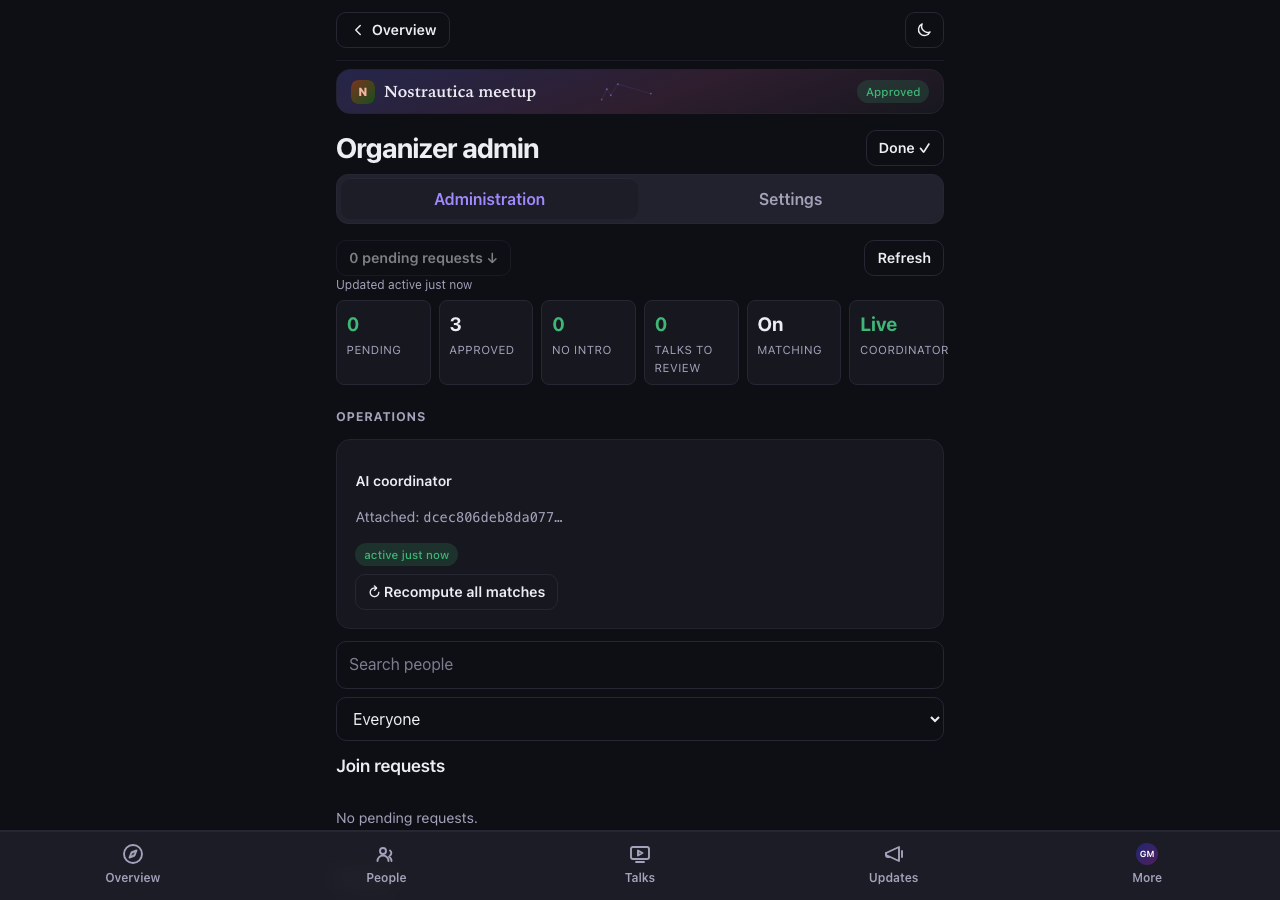
Fresh event, no requests yet:
The overview strip
At the top of Administration, before any per-person detail, a compact overview puts the state of the whole event in one glance: pending / approved / no-intro counts, whether matching, the coordinator, and billing are healthy, and anything that actually needs your attention (failed jobs, talks awaiting review) surfaced above the routine detail rather than buried in it. Below it, a search box and filter narrow both the join-request queue and the approved list at once, by name or by status (pending, approved, no intro, processing failed, talk submitted), so a 200-person event doesn't mean scrolling to find the one person who emailed you:
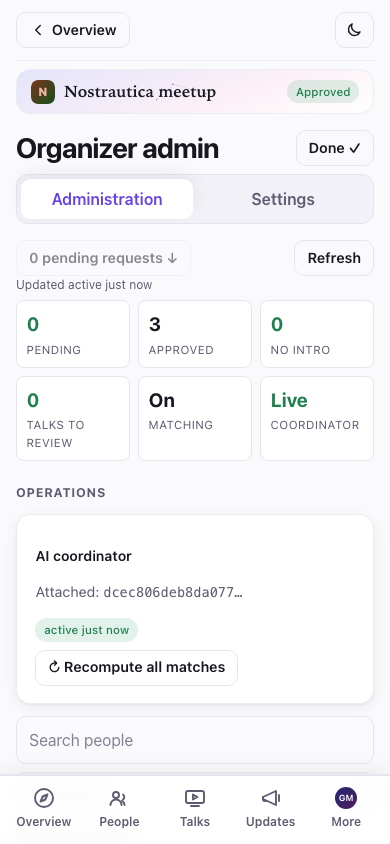
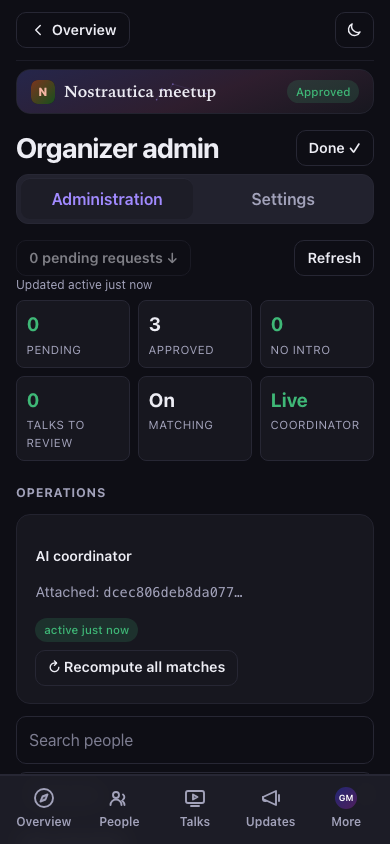
Tap anyone's row to open a detail drawer with their submitted profile, media, and operational history (coordinator status, submitted talks), without leaving the list.
You have three kinds of links to share:
- The open event link (
…#/e/<event>/join, shown near the bottom with a Copy invite link button). Anyone can view the public event page and request to join. Put it on your site or socials. - Invite codes: single-use links that auto-approve the holder when a
coordinator is attached. Set a count and tap Generate; you get one link
- QR per code. Send one per person, or print the QR codes. The code rides the URL fragment and never touches a server, so treat each link like a ticket.
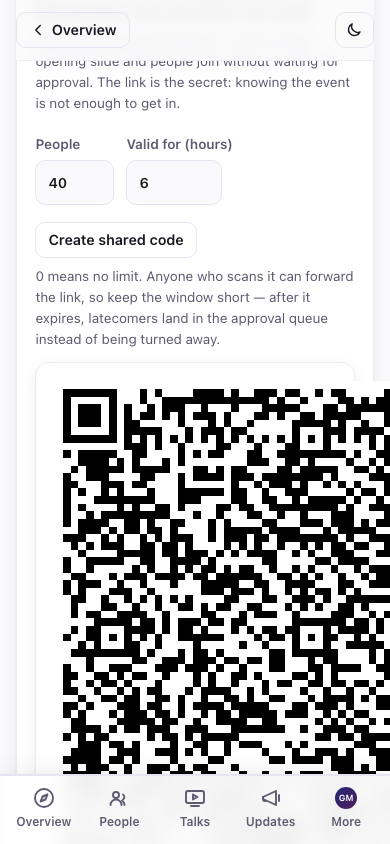
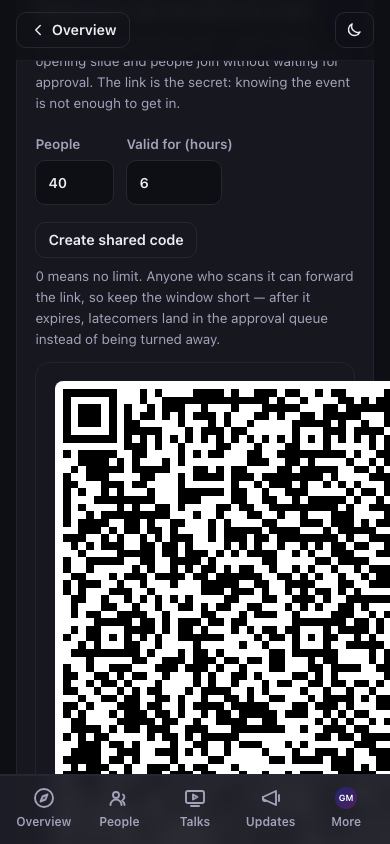
- Shared entry code: one QR the whole room scans at once, instead of one link per person. Set a headcount and a validity window, then tap Create shared code for a single link + QR to put on the opening slide. 0 works in both boxes and means "no limit" in both: 0 people is any number of them, 0 hours is a code that never expires. The form says in words what the code you are about to create will do ("Expires 15 Sep 2026, 23:26" or "This code never expires"), and the generated panel repeats it under the QR, so check it says what you meant before handing the link out. The code only exists in this browser tab, so copy or show it before you close the page, because it can't be retrieved again. A short window is safer, because anyone who scans the code can forward the link; and when a code does expire it is not refused, latecomers simply land in the approval queue.
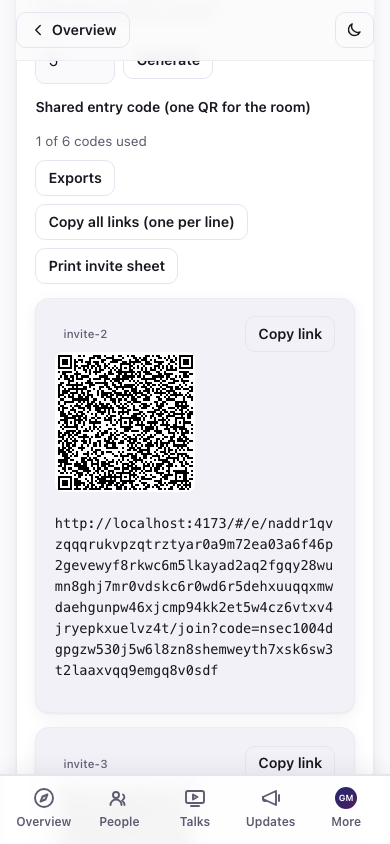
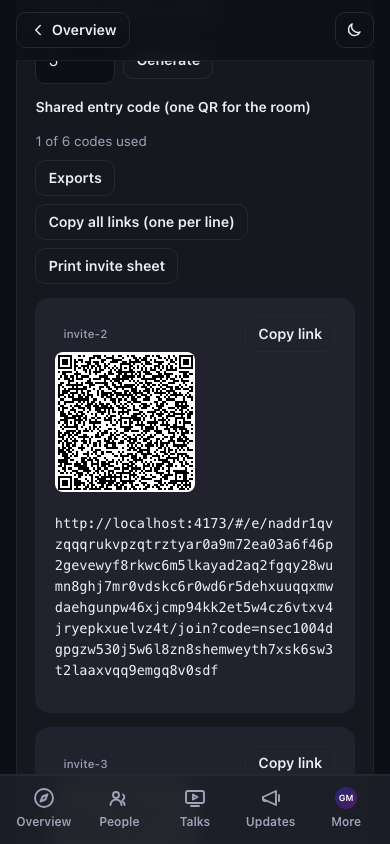
More than a handful of codes gets tedious to hand out one link at a time. Copy all / Download grab every generated link as plain text for a mail-merge, and Print invite sheet lays out one QR per code, several to a page, ready to cut up and hand out at the door.
4. Approve attendees
Join requests appear in the Join requests section. Each shows the person's name, a short id, their skills, an invite badge if they used a code, and a 🎥 badge if they've recorded an intro. The "N pending requests ↓" button at the top jumps you there.
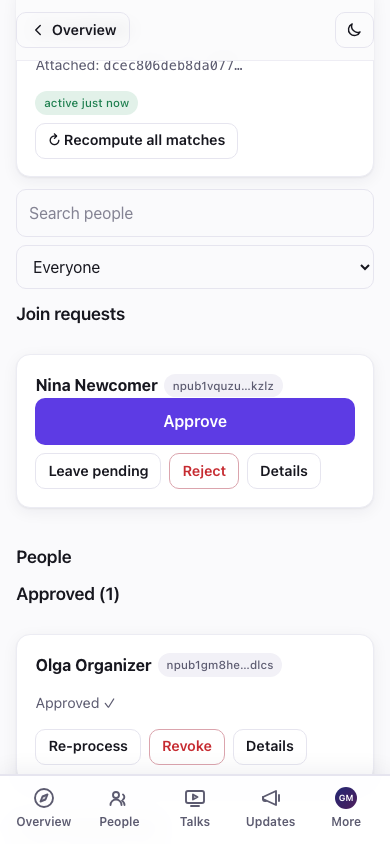
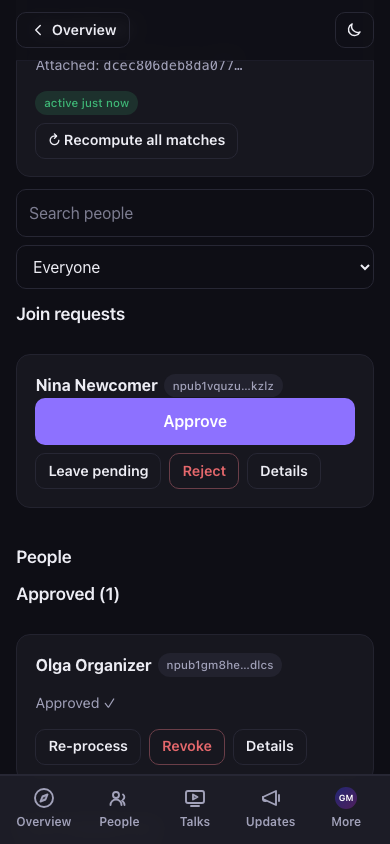
Tap Approve on the people you want in one at a time, or Approve all (N) to work through everyone waiting. Bulk approval reports each person's outcome individually (queued → publishing → confirmed, or failed), so one person's flaky connection never hides whether the other nine went through; a summary line ("N approved, M need retry") wraps it up, and any failure gets its own Retry rather than making you redo the batch.
Not everyone waiting needs a yes-or-no right now: Reject hides a request locally (the attendee isn't notified, and it's undoable from a small "N rejected" strip), and Leave pending just marks it reviewed without committing either way. Both are local bookkeeping for you, not protocol actions, so they're free to change your mind about later.
Approved people move to the Approved section. Each approved card has Re-process (re-publishes their directory entry / recomputes their matches) and Revoke.
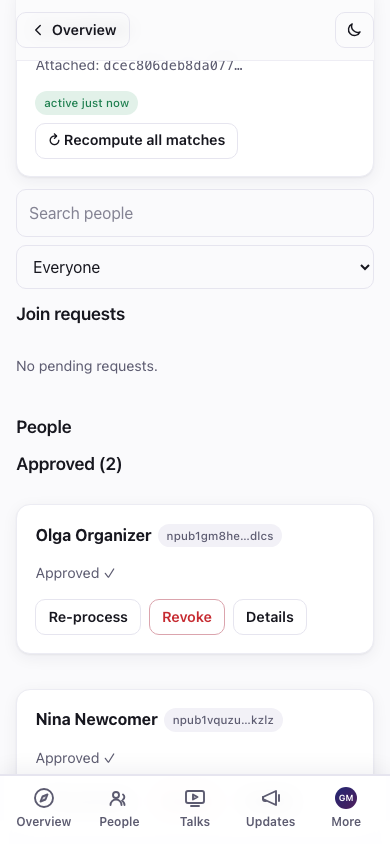
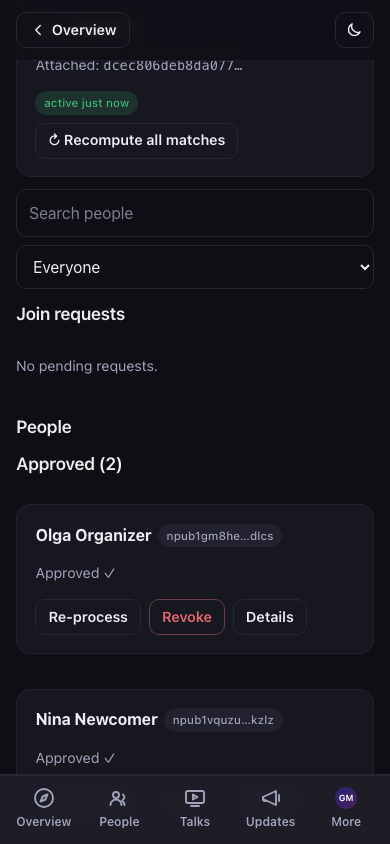
Approved attendees get access to the encrypted roster, other people's intro videos, and (with a coordinator) their matches. Approving someone works the same whether or not a coordinator is attached; attaching one (§5) is still worthwhile for auto-approval and matches, just no longer required to make manual approval work.
Removing someone
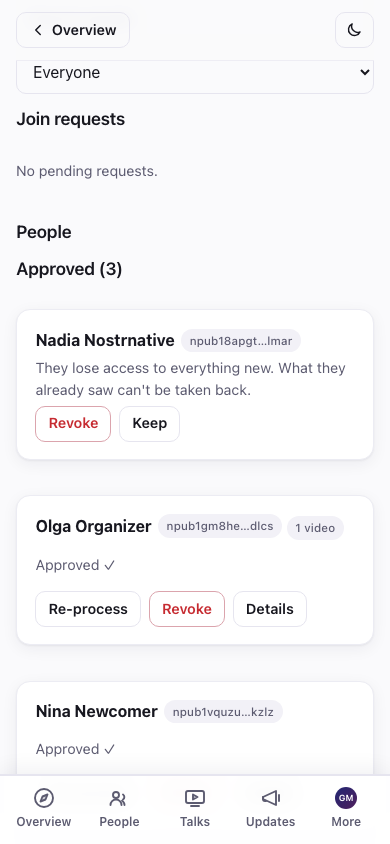
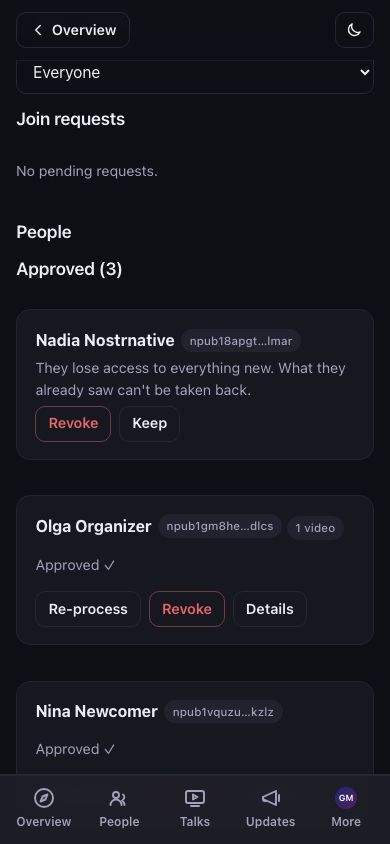
Tap Revoke on an approved card. You'll get a confirmation explaining the consequence:
"Revoke {name}? They lose access to everything new. What they already saw can't be taken back."
Confirming rotates the event key for everyone else automatically, so the revoked person can't decrypt anything published from that point on. What they already saw can't be unseen, so revoke early if in doubt.
5. Attach the AI coordinator (matchmaking)
The coordinator is a small service that transcribes intro videos, builds a profile of each attendee, and computes who should meet whom. Without it, the event still fully works, with the roster, videos and follows all intact. There are just no automatic matches, and invite links need your manual approval.
You can pick one right on the create form (§2) so it's live from the start, or attach one later. It's the same discovery list either way, just relocated: on an existing event it's under Admin → Settings → AI coordinator, not Administration (that tab is for things you do repeatedly; attaching a coordinator is one-time setup). Either way you pick a coordinator from the list. Each announces itself on Nostr with its name, features, a privacy disclosure (which AI steps leave the secure enclave), and its pricing (the reference one is Free). Tap Use this coordinator:
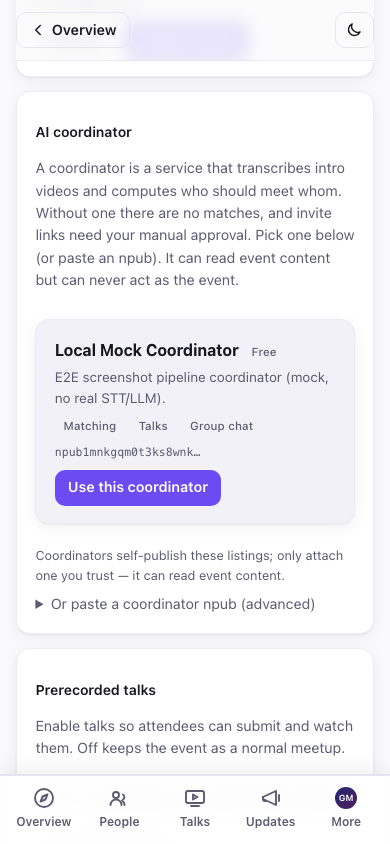
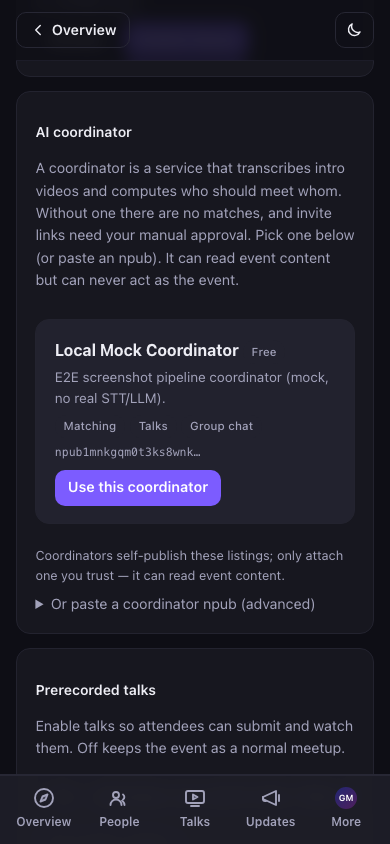
Prefer to run your own, or were given a specific one? Expand Or paste a coordinator npub (advanced) and paste its public key instead. Either way you'll see it confirmed:
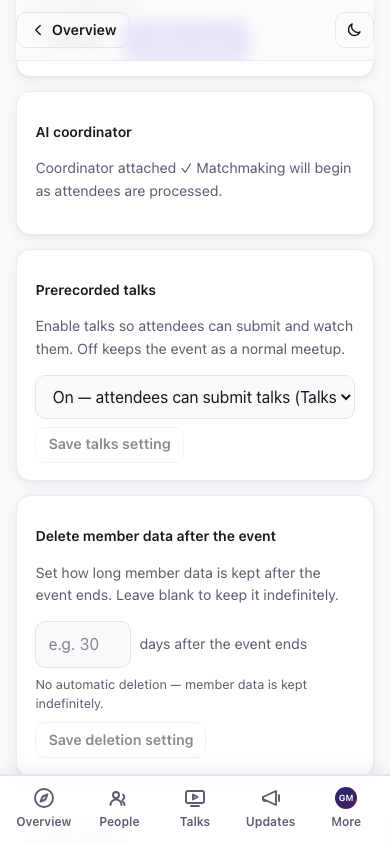
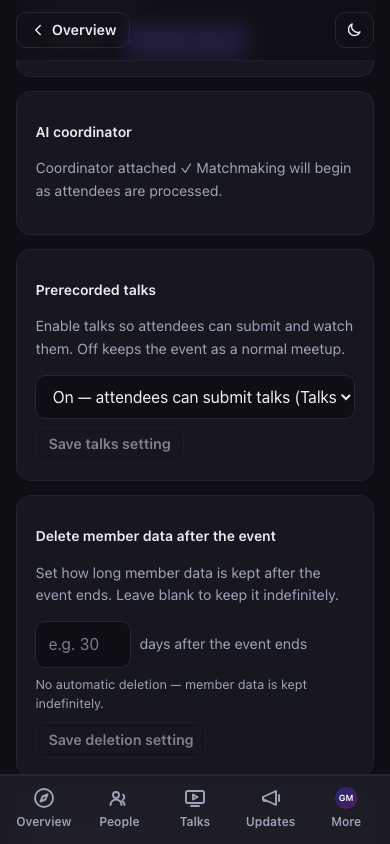
Paid coordinators. A coordinator may charge (AI matchmaking costs scale with attendee count), so a listing can show a price or a free tier (e.g. "up to 20 attendees free"). If payment is ever needed, the Settings screen shows a Payment required banner with a checkout link. The current reference coordinator is free.
The coordinator can read submissions and publish on the event's behalf: directory entries, rosters, matches, talks. It can never impersonate you or change your event's settings. Choose an operator you trust with that authority. An ↻ Recompute all matches button appears on the Administration tab (it's a recurring action, not setup); use it after a burst of new attendees.
Replacing or detaching a coordinator
Not happy with the one you picked, or need to stop paying for one? Back on Settings → AI coordinator, Replace opens the same discovery list (or the npub field) to switch to a different coordinator. This rotates the event's keys and re-grants the new coordinator, and the old one loses access from that point on. Detach removes it entirely, with no replacement.
Both are one-way for the coordinator you're leaving: once replaced or detached, it can't regain authority over the event later. Detaching specifically means:
- Matching stops until you attach another coordinator.
- Chat administration is orphaned if you had group chat on. Nobody is actively adding new members to the encrypted room until a new coordinator takes over (existing members keep their access; see §6.5's note on organizer devices as a backstop).
- Past content stays exactly as readable as it always was. Detaching doesn't retroactively hide anything, it only stops future processing.
Attaching or detaching mid-event
Both operations are safe to do while an event is running, but a coordinator restart drops whatever it was mid-processing at that instant. The job retry logic resumes it, but if you're actively running an event, it's kinder to your attendees to do this kind of change between processing bursts (right after a wave of arrivals settles) rather than the moment someone's intro is uploading.
Running the coordinator is a separate, technical step (a small daemon that needs
ffmpegand an LLM/STT provider key). Seepackages/coordinator/coordinator.example.toml, the operator guide, and the repo README. Point its relays at the same relay your event uses.
6. Post to your attendees
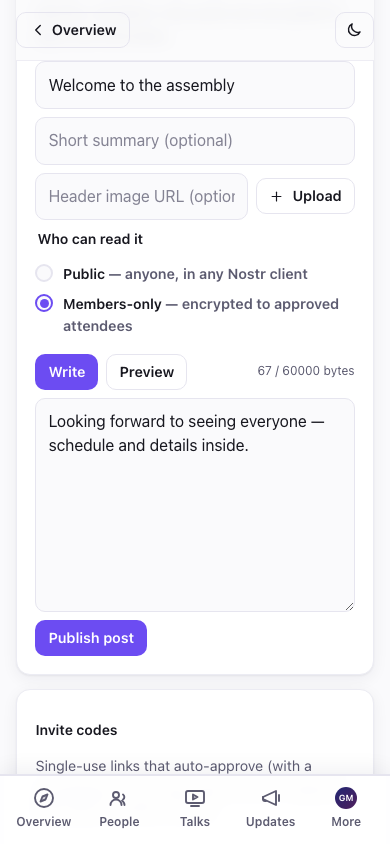
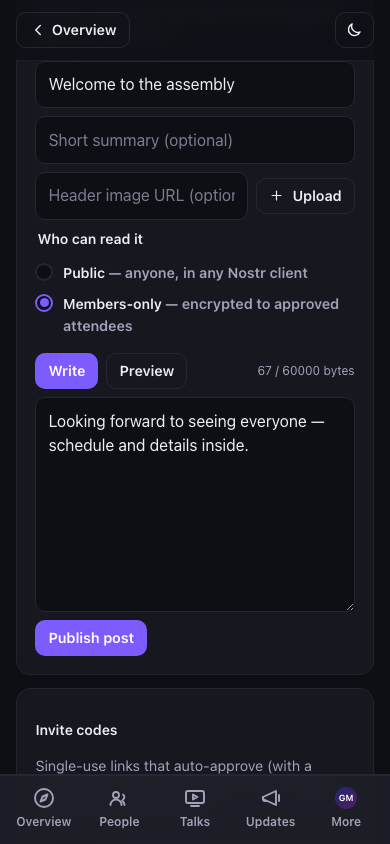
The Event posts card (under Communicate in admin) is your announcement channel: "schedule is live", "venue change", "tonight's dinner is at…". Give it a title and an optional summary/header image, write the body (Markdown works: headings, lists, links, bold), and pick who can read it:
- Public: anyone with the event link sees it, logged in or not. These are standard Nostr long-form posts published under the event's identity, so they're visible in other Nostr readers too.
- Members-only: encrypted to your approved attendees. Non-members (and the public) see only a lock and a "join the event to read this" prompt, never the content. Use it for the after-party address, the door code, anything you want to stay inside the room.
Tap Publish post. The visibility is fixed once published (you can edit the text later, but a public post can't be quietly turned members-only or vice versa). You can also drop a link to an existing post straight from the composer's picker, and pin a post to the top of the event page.
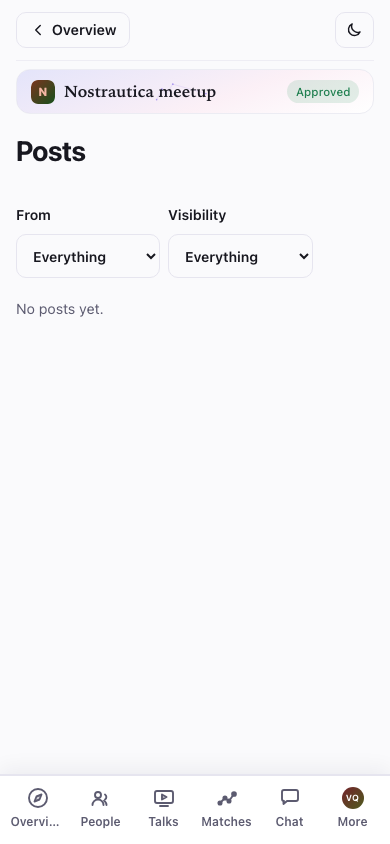
Public posts render on the event page for everyone; members-only posts show up for approved attendees in Updates and in the event's Overview "Latest" strip, marked with a lock badge. Here's the members-only lock as an attendee who hasn't joined yet sees it:
Customize the event page and its look
Two more controls live in Admin → Settings:
- Event page (kind 31608): build a custom menu and arrange sections (which posts show where) for the public event page, instead of the default layout. Reorder with the ↑/↓ controls.
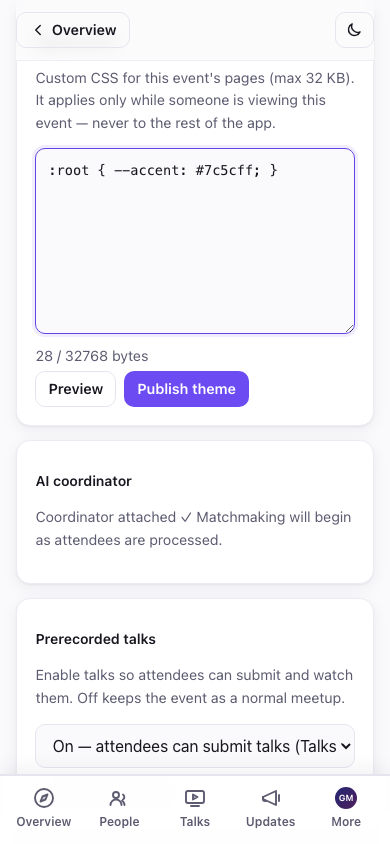
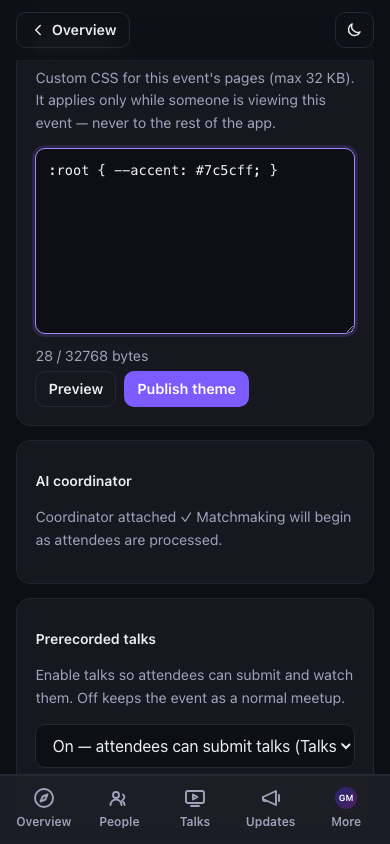
- Appearance (kind 31609): paste custom CSS to theme this event's pages. There's a live Preview before you Publish theme; leaving admin without publishing restores the last published theme for everyone, but your unsent CSS is kept as a draft and restored in the editor when you come back (with a Discard button to drop it), so navigating away no longer loses work in progress. The same holds for an unsent event post and unsaved profile edits. It sits on top of the app's built-in per-event colour wash, so a little goes a long way. (Only paste CSS you wrote or trust: it styles the page for every attendee. Note: your theme applies across the event's pages except a few routes that show sensitive material. The chat device handoff and admin invite/coordinator screens deliberately render without it, so a hostile theme can't be used to fish for keys or invite codes off those specific screens.)
Not sure what your changes look like to someone who isn't in yet? The event menu has a View as visitor toggle. It hides everything members-only (locked posts, members-only menu items and sections) so you see exactly what a stranger with the link sees, with an exit bar to jump back to your normal organizer view any time. There's deliberately no equivalent "view as a member" mode, because your own organizer view already is the member view for everything that isn't visitor-specific.
6.5 Talks and group chat (both new, both optional)
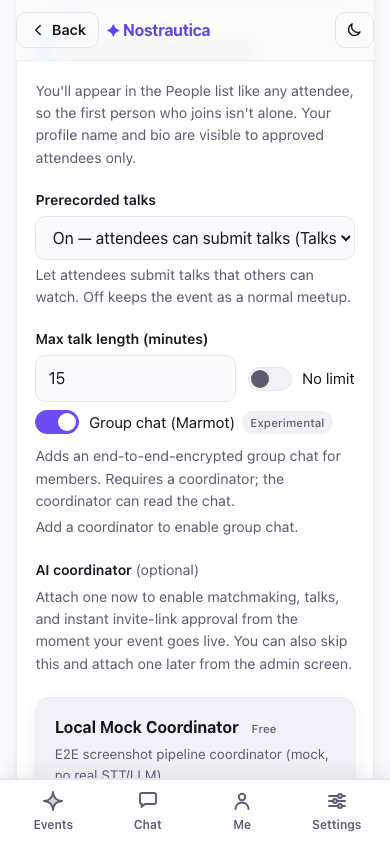
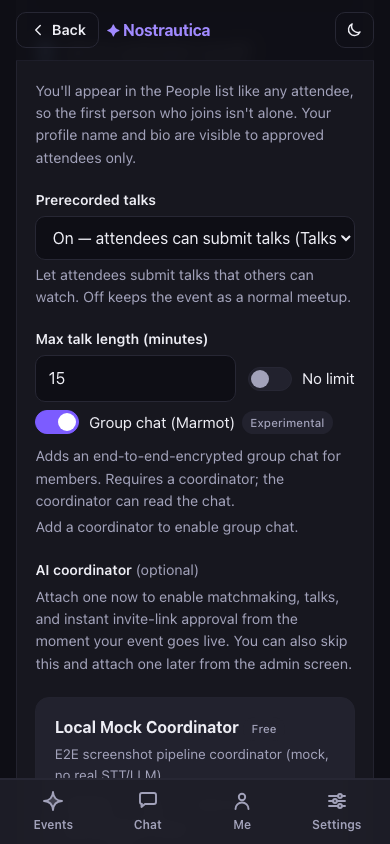
Prerecorded talks. In Admin → Settings → Prerecorded talks, switch it On (or Prerecord-first, which puts Talks ahead of People in attendees' nav, good for a "watch ahead, meet at the venue" format) and Save. Approved attendees can then submit short talks: recorded in the browser, uploaded as a file, or given as an unlisted YouTube / .mp4 URL (useful for talks too large to upload; the coordinator never fetches these, so URL talks are watch-only).
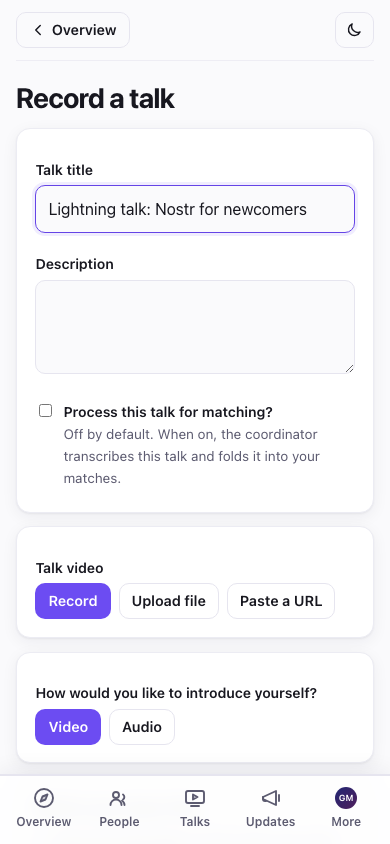
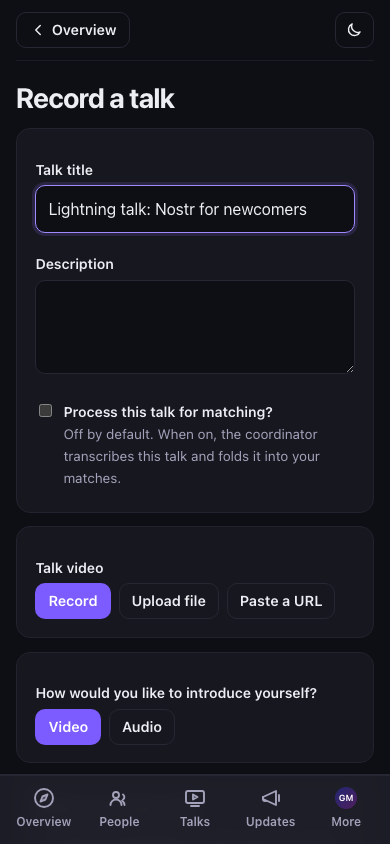
Note that talks no longer feed matching by default: a speaker chooses, per talk, whether to tick "Process this talk for matching?". Leave that in mind if a submitted talk doesn't appear in anyone's match reasoning. That's expected unless the speaker opted in (and it never happens for URL talks). This keeps transcription costs off talks nobody asked to match.
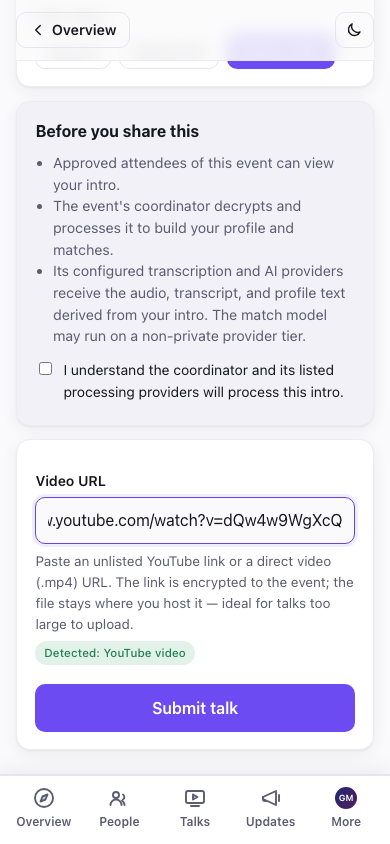
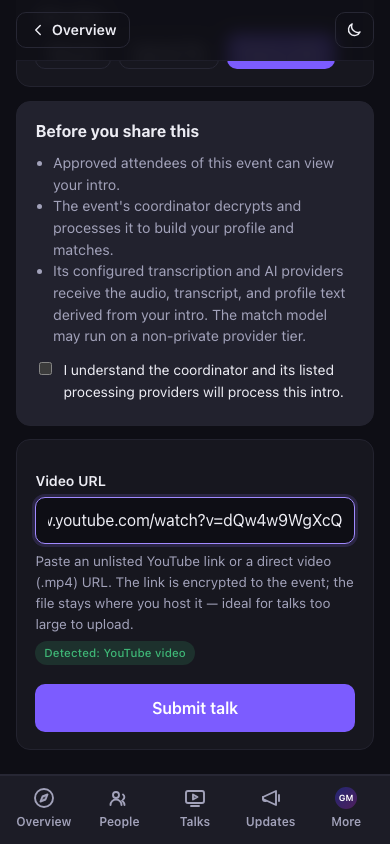
Submitted talks don't go live by themselves. A Talks moderation card further down Administration lists everything waiting for review. Preview each one, then Publish it so attendees can watch, or Reject it. Nothing an attendee submits is visible to anyone else until you act on it here (and publishing needs a coordinator attached, same as the rest of admin). The People search/filter (§3) has a Talk submitted filter, so on a busy event you can jump straight to who's waiting on you without scrolling the whole roster.
Group chat (Marmot, experimental). In Admin → Settings, toggle Group chat and save. It needs a coordinator attached (the coordinator operates the encrypted group: adding people as they're approved, removing them on revoke). Once on, approved attendees get a Chat tab: a single end-to-end-encrypted room for the whole event, separate from 1:1 messages: a normal running conversation, nothing for them to configure, and every device they open it on joins automatically (see the participant guide's "Group chat" section for the per-device details attendees see).
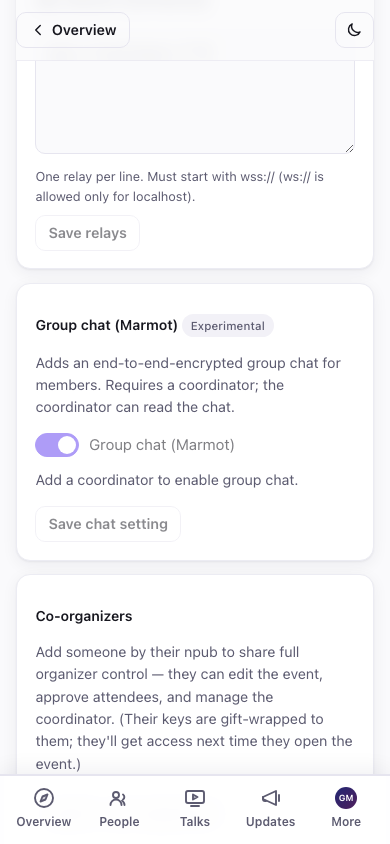
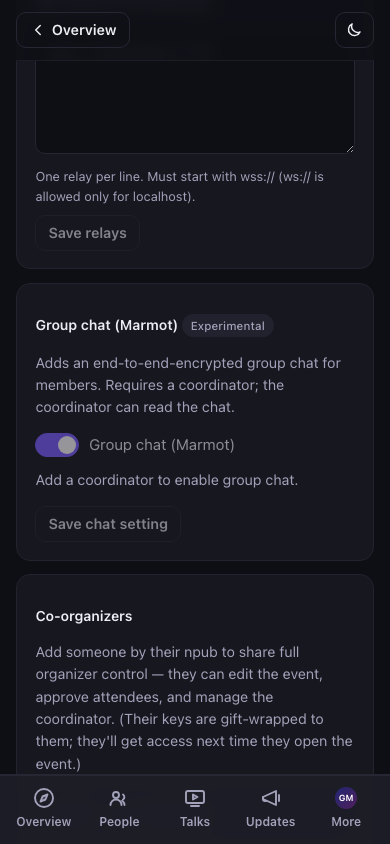
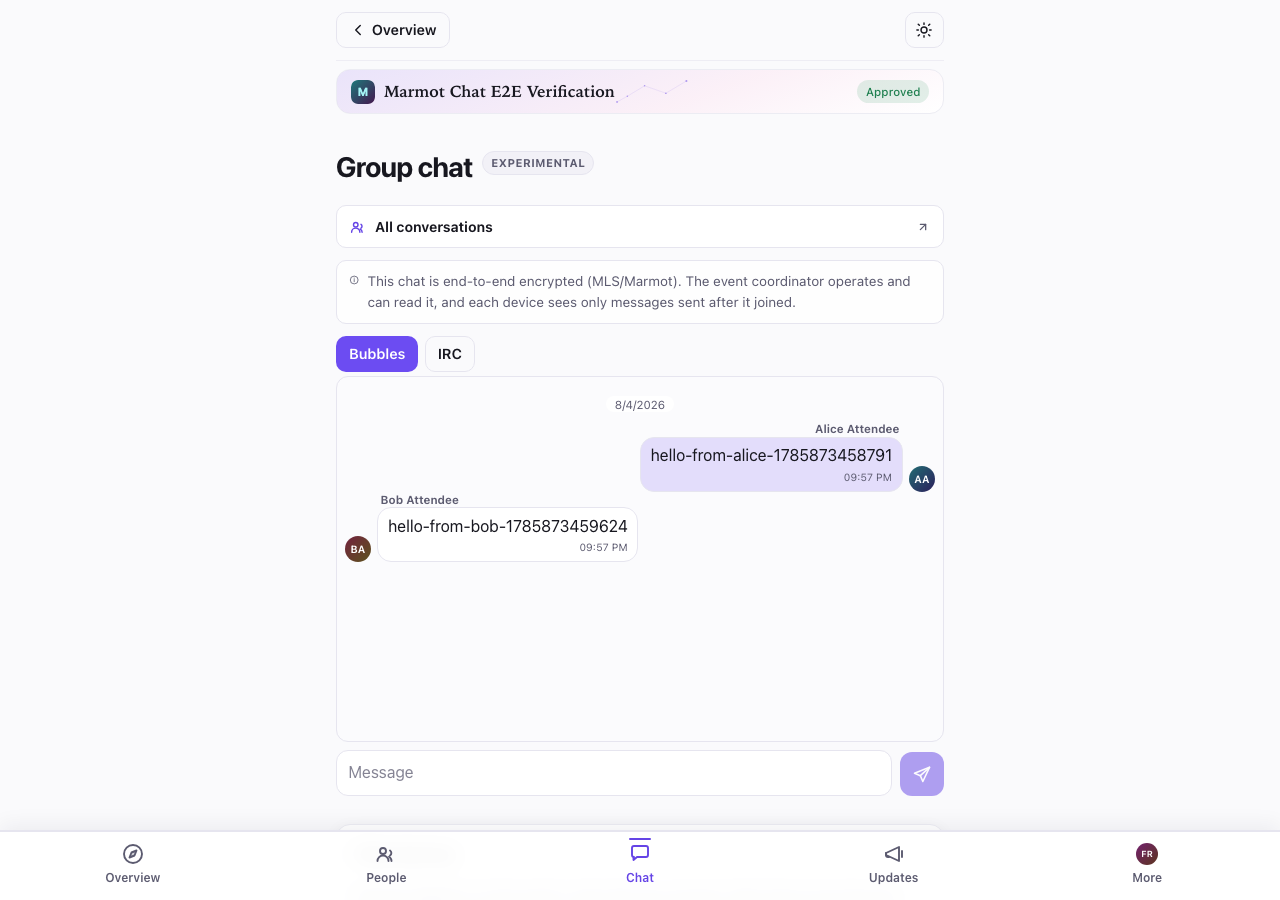
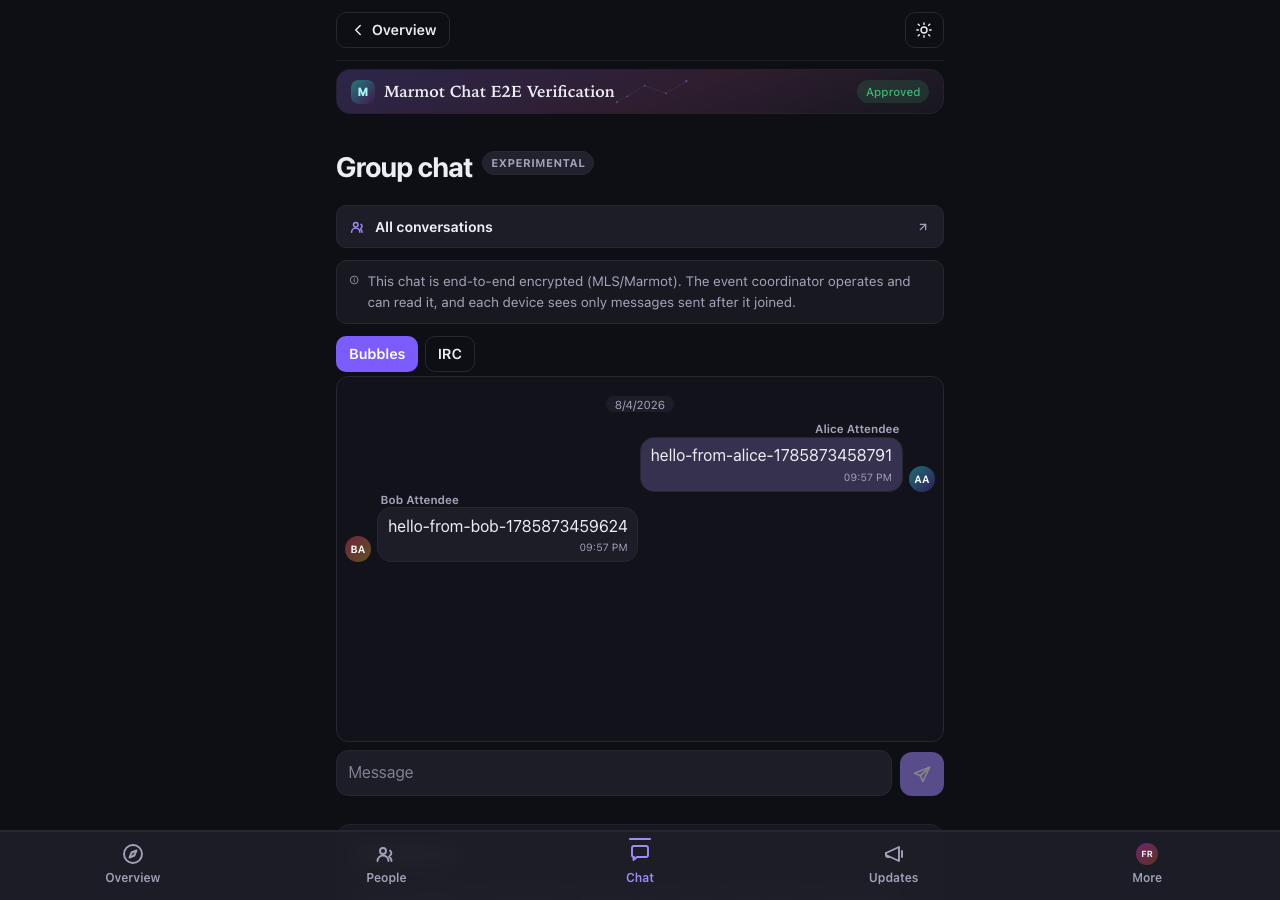
This is early: joining the group can take a little while server-side even once toggled on, and it's marked Experimental in the UI on purpose. Don't lean on it as the only way to reach attendees during an event yet. Posts (§6) remain the reliable channel.
A quiet safety net. The coordinator administers the group day to day, but every device an approved organizer attests to the chat is automatically promoted to co-administrator too, with no enrollment step: it just happens. If your coordinator's database is ever lost with no backup (see the operator guide), your own devices can still add or remove members and keep the room running while you sort out a replacement coordinator. Keeping the coordinator's backups current is still the real recovery plan; this is the backstop for when that plan fails.
6.6 A meetup series: events that belong to a community
If you run the same kind of event again and again (a monthly Bitcoin meetup, a conference with a yearly edition), you can group the dated events under one standing community. People who attend any of the meetups can become members of the community without a second approval, and the community keeps its own member list across all of them.
Set it up in this order:
- Create the community first. On Create, choose A community and tap Create community. It has no date and no end.
- Create each meetup and link it. On the event's create form, a Part of a community picker appears (only if you organize at least one community on this device). Choose the community. The coordinator and relays are filled in from the community, so a meetup uses the same ones unless you change them. Everything else on the form works as before.
- Or link an event that already exists. Open Admin → Settings → Part of a community, pick the community and tap Save community. If people are already approved for that event, the app tells you how many were sent the invitation to join the community.
A link only counts when both sides list each other: the event names the community and the community names the event. The app does both when you link from the event, so a stranger cannot claim your community by naming it in their own event.
What attendees see. On the Join form of a linked event they get a line saying that joining also makes them a member of the community, and a checkbox, Also join the community "…", switched on by default. The community's organizers see their name, profile, and that they joined this event. People who turn the box off join only the event. People who joined before you linked the event see a card on the event, You can join "…" too, with Join and Not now.
What stays separate. The event and the community each keep their own People list, matches and group chat. Joining a meetup does not put someone into the other meetups' lists, and leaving a meetup does not remove them from the community. Event and community can even use different coordinators.
Approving community requests. A request that comes from a meetup carries a Member of "…" badge on the card, meaning the organizers of that event confirmed the person is approved there. With a coordinator attached to the community these are approved automatically. Without one, Approve verified members (N) in the community's Join requests approves all of them in one tap. Direct joins still work as before: invite codes and manual approval do not change, and someone can be in the community without ever attending a meetup.
See and change the list. The community's Settings has an Events in this community card listing the linked events, each with Remove. The community's page shows its events, upcoming first, and each event's page links back to the community.
Unlinking. Tap Remove on the community side, or choose Not part of a community in the event's settings and save. New attendees are no longer offered membership. Nobody is removed: people who already joined stay members, and you can still revoke a member in the community itself like any other attendee. If an event points at a community you do not organize from this device, you can still end the link from the event's side.
7. During the event
- Roster fills in live: approved attendees appear as they join; their matches, shown at the top of People, refresh as new intros are processed.
- Recompute matches: after a rush of arrivals, tap ↻ Recompute all matches (coordinator required).
- Co-organizers: in Admin → Settings → Co-organizers, add someone by their npub to share full organizer control (edit event, approve, manage the coordinator). Their keys are gift-wrapped to them; they get access next time they open the event. This is also your safety net if your browser dies.
- Encourage intros early. Matches only exist for people who recorded an intro, so the single best thing you can do for match quality is get everyone to record before the event starts. Recording is optional for attendees, and the app tells them so, but it's worth pushing: a recorded intro gives the AI more to work with, lets other attendees preview whether they'd actually vibe with a match before walking up to them (matching isn't only projects and skills, it's also a feeling AI can't capture on its own), and if it's a video, it helps people recognize their matches in person.
Troubleshooting & FAQ
What do attendees see before they're approved? Only the public event page: title, summary, dates, location, and your posted updates. The roster, videos, and matches are encrypted to approved attendees.
I opened the event on another device and there's no admin button. Sign in with the same identity (paste the secret key you backed up when you created the account) and reopen the event. Organizer access to every event you created is automatically recovered from that one key alone, no separate event backup needed. It reads back your event keys from relays the moment you sign in, so give it a few seconds on a fresh device before concluding it didn't work. (Adding a co-organizer from the original device, using the new device's npub, is still the fastest option if you still have the original device handy.)
An invite link didn't auto-approve someone. Auto-approval needs a coordinator attached and running. Without one, invite requests still arrive in your Join requests list, so approve them there. (They'll carry an invite badge.)
A join request isn't showing up. Tap Refresh in the admin header, because requests are fetched on demand. If it still doesn't appear, the attendee may be on a flaky connection; ask them to reopen the event link and resubmit.
How do I project the roster / match board / admin overview at the venue? Open the relevant page on the projector's browser while logged in as an approved identity (yourself). These are normal pages, so full-screen them:
Can I edit an event after creating it? Yes. Admin → Settings → Event details lets you edit the core fields (title, summary, start/end, location, and the icon/banner) and republish them. (The republish follows the protocol's monotonic ordering rule, so an edit never loses to a same-second race.) You can also post updates and edit those freely, and co-organizers can manage the event too. For a schedule or venue change it's still worth posting an update as well, so attendees get a notification rather than only a quietly-changed field.
What does this cost me? Nothing, by default: the reference coordinator is free, and everything that doesn't involve a coordinator (roster, videos, posts, manual approval) never has a cost regardless. If you attach a coordinator whose operator charges, you'll see that plainly on its listing and, if billing ever kicks in, a Payment required banner with a checkout link in Settings. Never a surprise charge.
An attendee edited their intro but nobody else sees the change. Without a coordinator attached, edits to typed intro text don't propagate on their own, so tap Re-process on their card in the Approved list (§4) to pick up the update.
Why can't a coordinator I replaced or detached come back into authority? Every attach/replace/detach bumps an internal generation number, and coordinators only ever trust the current one, so an old grant can't be replayed back later. Nothing for you to do here. It's just why detaching or replacing is final for the coordinator you're leaving.
Appendix: tracking invite codes when you sell tickets elsewhere (optional)
Everything above is the whole story for most organizers. This section is only for the specific case of selling tickets somewhere other than Nostrautica (Eventbrite, your own webshop, cash at the door), where the only thing you have on a buyer is their email address. You send each of them one invite link; some join right away, some never get around to it, and a few days before the event you want to nudge exactly the people who haven't shown up yet.
Set this expectation early: the app never learns anyone's email address, and it never sends anyone an email. Mailing codes out, and matching a code back to the person you sent it to, is entirely your own job, done in your own tools: a mail-merge, a spreadsheet, whatever ticketing system you already use. All the app can ever tell you is which code numbers have been used.
Every code carries a number
Each invite code you generate is labelled invite-1, invite-2, and so on, right next to it wherever it appears. That number is the only thing linking a code back to a person, and only you know who: write it in a column next to their email address the moment you send the code out, in a file of your own.
Numbers keep counting up. Generate 20 codes today and 10 more next week, and the new ones start at invite-21. Nothing already handed out changes its number, and none get reused.
Two exports for two different moments
Open Exports, under invite codes in Admin (§3). There are two downloads here, on purpose, because they answer different questions at different times:
- Codes for mailing gives you the actual codes and links to paste into a mail-merge, but only for the batch on screen right now, and only right now. Invite codes are one-time secrets the app deliberately never keeps a copy of anywhere, so export (or at least copy) a batch before you generate the next one or leave the page. Once you do either, that batch's codes are gone for good. Their numbers stay reserved; you just no longer have anyone to hand them to.
- Who has joined tells you which code numbers have been used. It needs no codes at all, so you can open it any time, weeks or months later, on any device where you're signed in as the organizer. This is the one you come back to.
The workflow
- Create your codes, then immediately export Codes for mailing in the spreadsheet format (CSV).
- Mail-merge it against your ticket list, keeping each code's number in a column next to the matching email address, in a file of your own.
- Closer to the event, or any time after, open Exports again and download Who has joined, with Unused codes only selected.
- Match those numbers back to email addresses in your file.
- Re-send to just that shorter list, instead of mailing everyone again.
Which format to pick
The spreadsheet file is the default, and it's the one to use for a mail-merge: open it straight in Excel, Google Sheets, or whatever you already use. The plain list of links is there mainly for people who script their own mailing instead.
One honest caveat
"Used" only ever counts up: once the app has seen a code used, it stays marked used, permanently. But "unused" is a softer signal than it looks. For an event that finished a while back, or if you simply haven't opened the organizer view since some people joined, a handful of codes can still show as unused even though those people genuinely did join. Treat used as certain, and unused as "probably not yet, worth a quick check before you re-mail someone." A little annoyance for someone who already joined beats no reminder at all for someone who didn't, but it's worth knowing this can happen rather than being caught off guard by it.
At the door
The invite sheet (§3) already leaves out any code that's been used, so if you print it again close to the event, everyone who joined online in the meantime simply won't be on the page anymore.